I recently purchased a cheap Proxmark clone from AliExpress - make sure you get the version with 512MB memory.
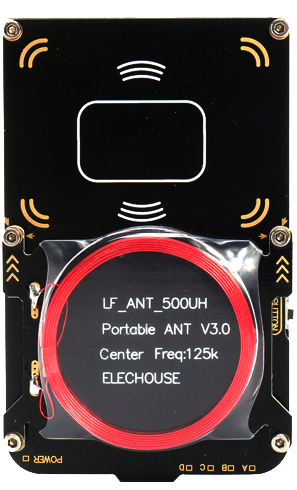
The device itself is a clone “Proxmark3 Easy”, which is considered obsolete by ProxMark but this clone has 512MB memory and it is still good value for money. When connected to a Windows 10 PC, it appears as a serial port device (COMx).
Install the software
You can download pre-compiled Windows binaries from Proxmarkbuilds.org. For the Proxmark3 Easy, use the latest RRG build. I got version rrg_other-20230207. Unpack the 7-Zip archive into an empty directory, for example “ProxMark3” off your home directory.
Connect the ProxMark3
Connect the ProxMark3 to your PC and verify that a COM-port is being assigned (check Device Manager).
Flash the firmware
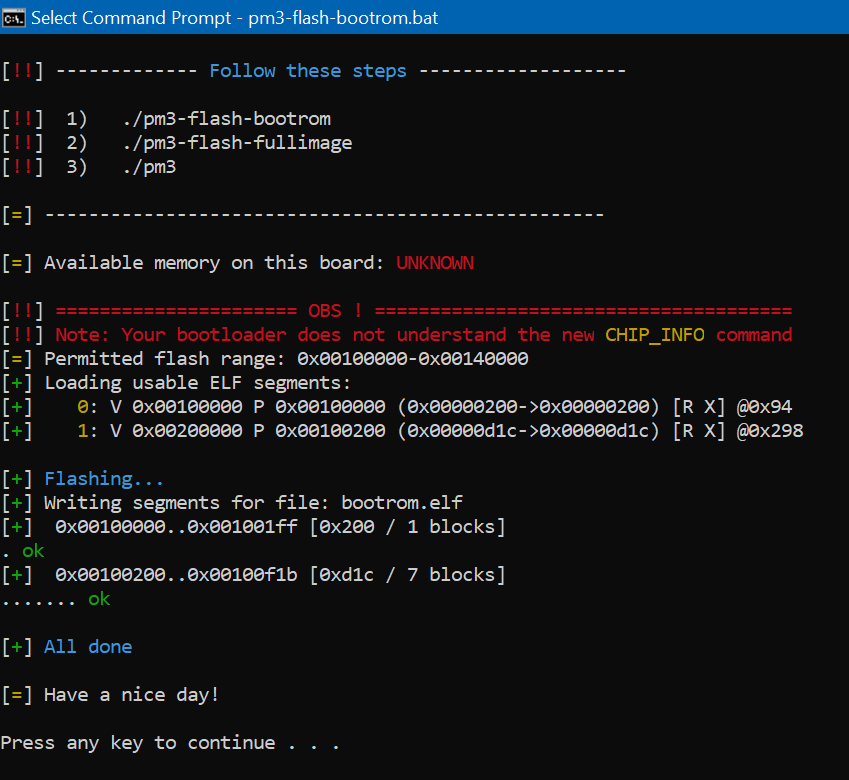
Open a command prompt in your ProxMark3 directory and run “pm3-flash-bootrom.bat”. Note that you may need to briefly press the side button while connecting the ProxMark device.
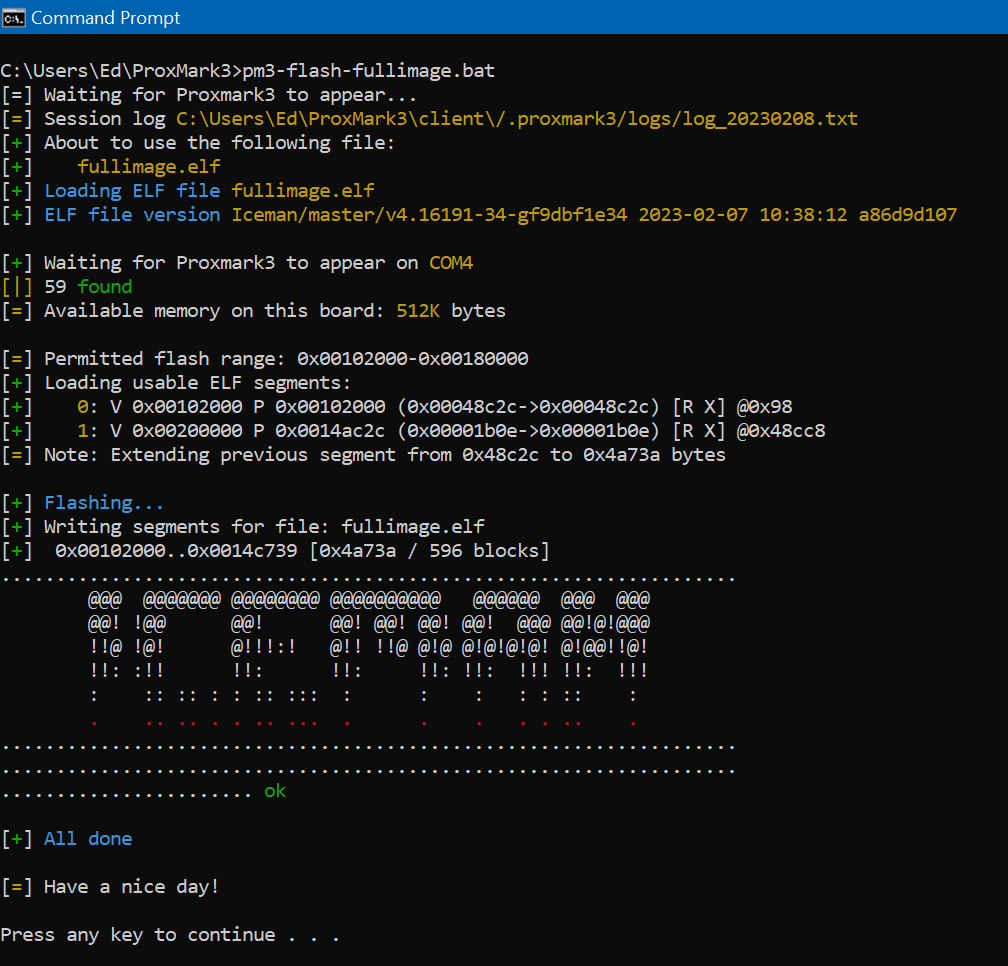
Next, go to your ProxMark3 directory again and run “pm3-flash-fullimage.bat”:
Test the ProxMark3
Put the device on a non-metallic surface (wooden desk), no not put any cards near it yet.
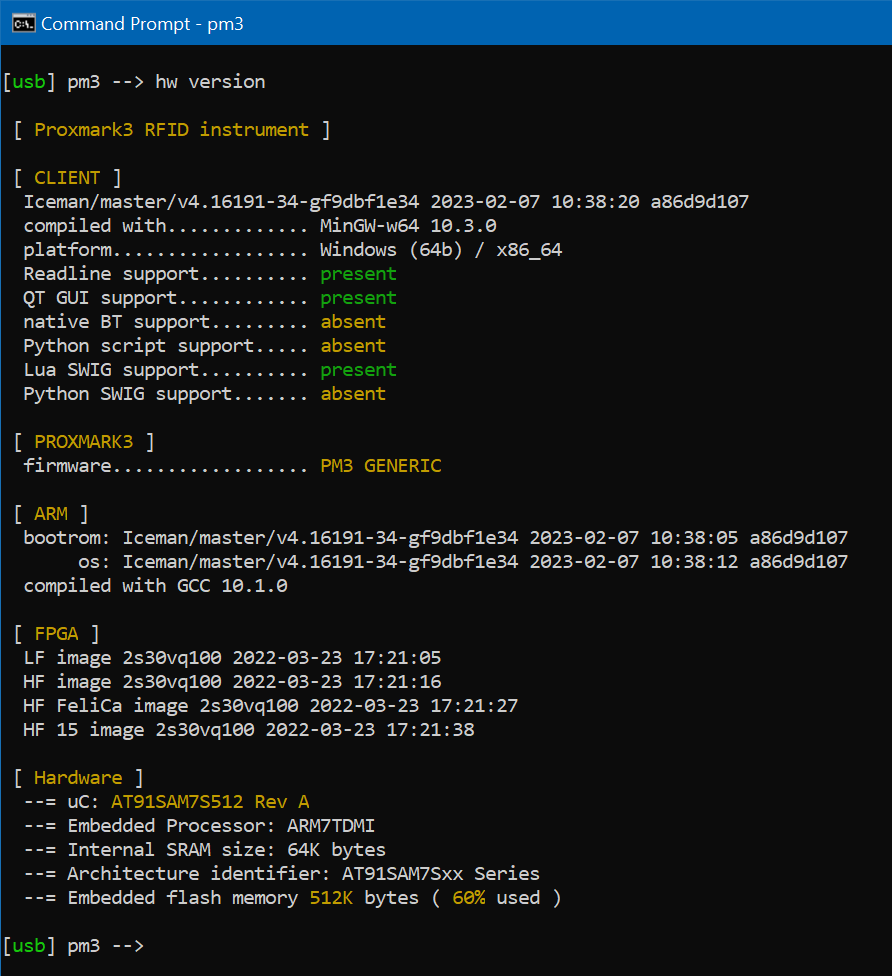
Start “pm3” and run the “hw version” command:
Finally, run the “hw tune” command and look for the voltages for the LF and HF antenna:
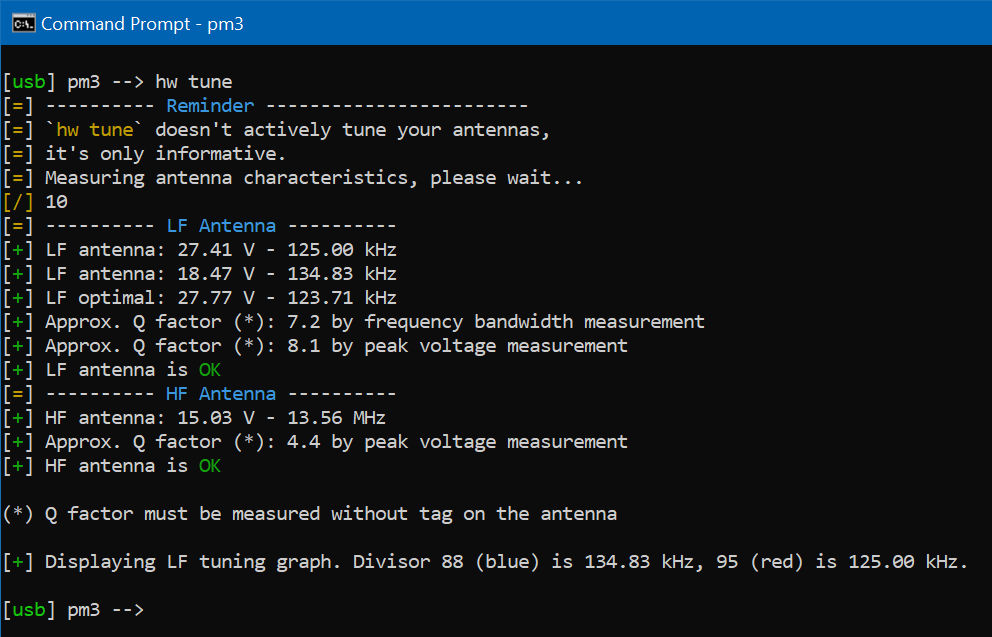
If it reports “LF antenna is OK” and “HF antenna is OK”, you’re all set!
Back to RFID / NFC