Our Panasonic airco units have a CZ-TACG1 WiFi interface for use with their “Panasonic Comfort Cloud” app. I wanted to integrate them in my Home Assistant setup, but I did not like their app - it required frequent re-authentication, and it looks very outdated.
Hardware
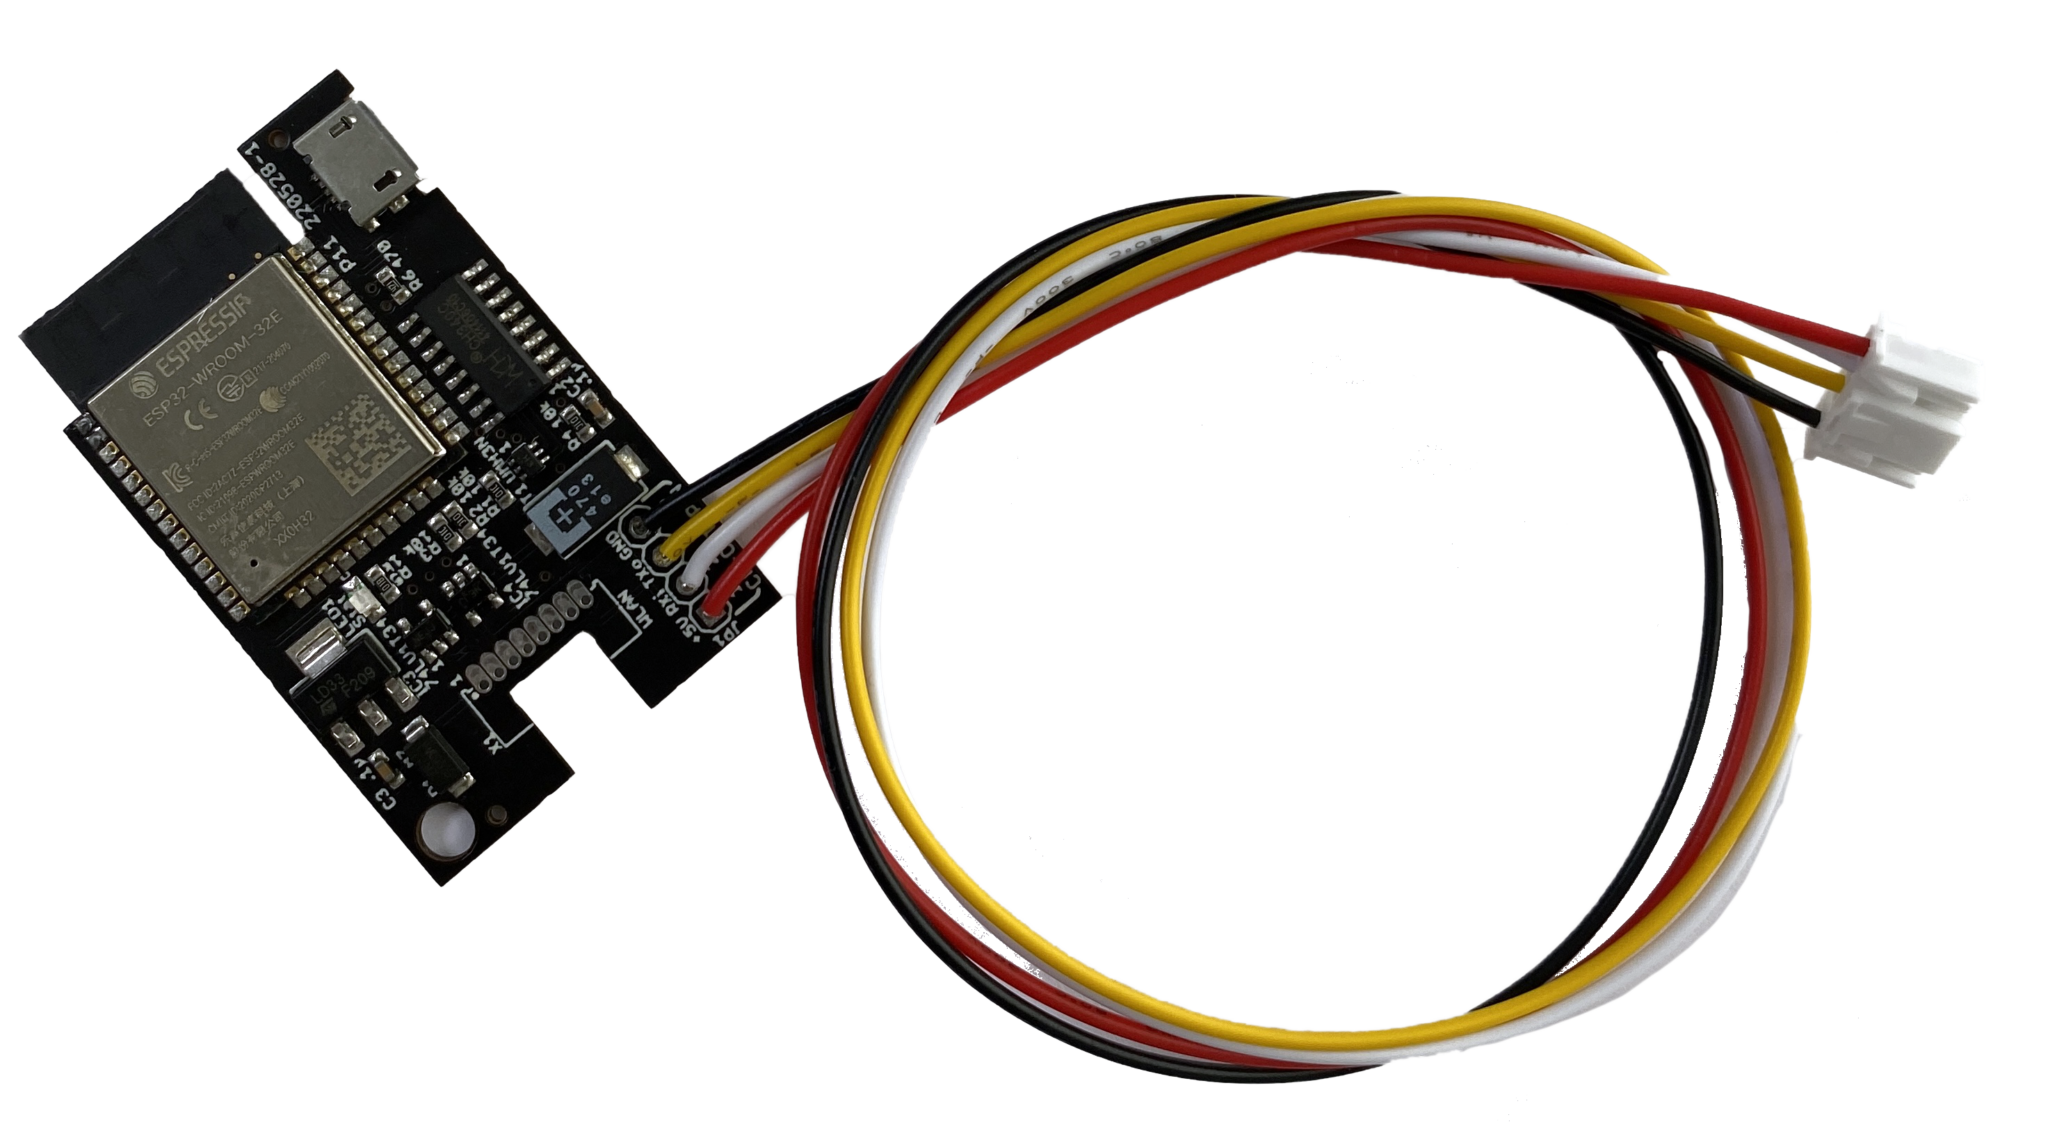
After a lot of searching I found a custom PCB to replace the CZ-TACG1. It was developed by the fine people at espthings.io - I managed to buy some boards from what appears to be their last batch. Fortunately, you can build your own interface using an ESP32 board and a 3.3V - 5V level shifter.
The software is based on the Open Source ‘esphome-panasonic-ac’ project by GitHub user Dominik. The project contains instructions on how to build and connect your own hardware interface.
Software
The ESPHome configuration YAML looks like this:
substitutions:
  devicename: "airco-downstairs"
  long_devicename: "Airco downstairs"
  pcb_version: "220722-1"

esphome:
  name: "${devicename}"
  name_add_mac_suffix: false ## if 'false' use different names/hostnames for each device!
  comment: "${long_devicename} ${pcb_version}"
  platform: ESP32
  board: mhetesp32minikit
  project:
    name: "esphome.pana-climate"
    version: "${pcb_version}"

external_components:
  source: github://DomiStyle/esphome-panasonic-ac
  components: [panasonic_ac]

wifi:
  ssid: !secret esphome_wifi_iot_ssid
  password: !secret esphome_wifi_iot_password
  ap:
    ssid: "${devicename} hotspot"
    password: !secret airco_ap_password

captive_portal:

web_server:
  port: 80

logger:
  level: DEBUG

api:

ota:

# Bluetooth proxy - might perform poorly with WiFi enabled
bluetooth_proxy:
  active: true

uart:
  tx_pin: GPIO17
  rx_pin: GPIO16
  id: ac_uart
  baud_rate: 9600
  parity: EVEN

# status_led: Pin GPIO13, converted to a switch to turn off the status led
light:
  platform: binary
  name: "${long_devicename} status led"
  output: status_led_output

output:
  id: status_led_output
  platform: gpio
  pin: GPIO13
  inverted: True

switch:
  - platform: restart
    name: "${long_devicename} restart"

sensor:
  # Uptime in seconds
  - platform: uptime
    name: "${long_devicename} uptime"
    id: uptime_seconds
    update_interval: 10s

climate:
  - platform: panasonic_ac
    type: cnt   # For CZ-TACG1 use type: cnt / For DNSK-P11 use type: wlan
    name: "${long_devicename}"
    vertical_swing_select:
      name: "${long_devicename} vertical swing mode"
    outside_temperature:
      name: "${long_devicename} outside temperature"
    nanoex_switch:
      name: "${long_devicename} NanoeX switch"
    current_power_consumption:
      name: "${long_devicename} power consumption"
In Home Assistant, a custom dashboard can be built using the following YAML:
type: grid
square: false
columns: 1
cards:
  - type: thermostat
    entity: climate.airco_downstairs
  - type: entities
    entities:
      - entity: select.airco_downstairs_vertical_swing_mode
      - entity: switch.airco_downstairs_nanoex_switch
  - type: entities
    entities:
      - entity: sensor.airco_downstairs_power_consumption
      - entity: sensor.airco_downstairs_outside_temperature
      - entity: light.airco_downstairs_status_led
      - entity: switch.airco_downstairs_restart
Software backlog
- See if enabling the “Bluetooth Proxy” functionality impacts overall stability.
3D-Printed case
I printed a nice case using the enclosure model files (.ZIP, local copy) provided by ESPthings.