These are my notes for configuring my HomeLab NAS for LACP (“Link Aggregation“, “network bonding” etc.) to increase bandwidth.
My home lab consists of a couple of Intel NUCs running the free edition of VMware vSphere 6U2, each with 16GB RAM and 256GB SSD. For additional storage, I use a Synology DS1815+ NAS.
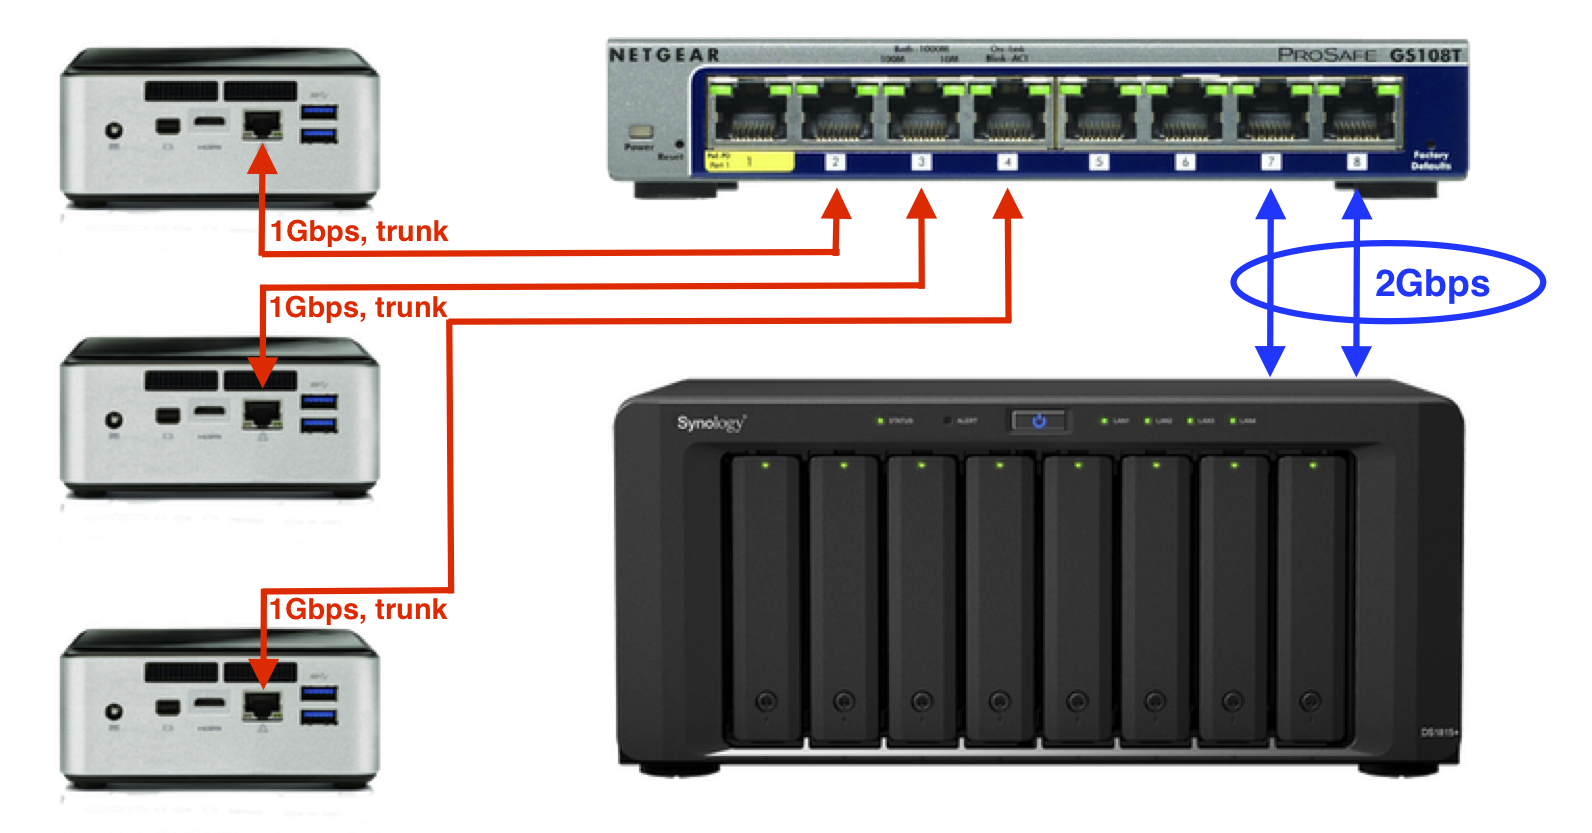
As the NUCs have only one 1Gbps network interface, I configured them as a ‘trunk’, carrying all VLANs. The Synology NAS has multiple network interfaces; I started out with a single connection.
To improve NAS bandwidth (and for my own amusement), I decided to upgrade the single 1Gbps connection to 2x 1Gbps using the “LACP” (Link Aggregation) protocol. I use NetGear smart switches with VLAN and LACP support, so this should be easy…
- Step 1: enable bonding on the Synology; log on to the web admin panel and go to Control Panel, Network, Network Interface, Create -> Create Bond. Choose LACP, select the interfaces to bond (I use a static IP address).
- Step 2: log into the NetGear switch, create a Link Aggregation Group (LAG) consisting of both ports. I used LAG1, with ports 7 and 8.
- Step 3: connect both network cables, check if everything works.
At this point, I ran into trouble. I couldn’t reach the NAS anymore. Turns out I made a couple of mistakes in my NetGear configuration. The fix was:
- Specify Jumbo Frames (9216) on the LAG;
not (just) on the physical interfaces. - Specify VLAN settings on the LAG;
check the VLAN membership as well as the PVID settings.
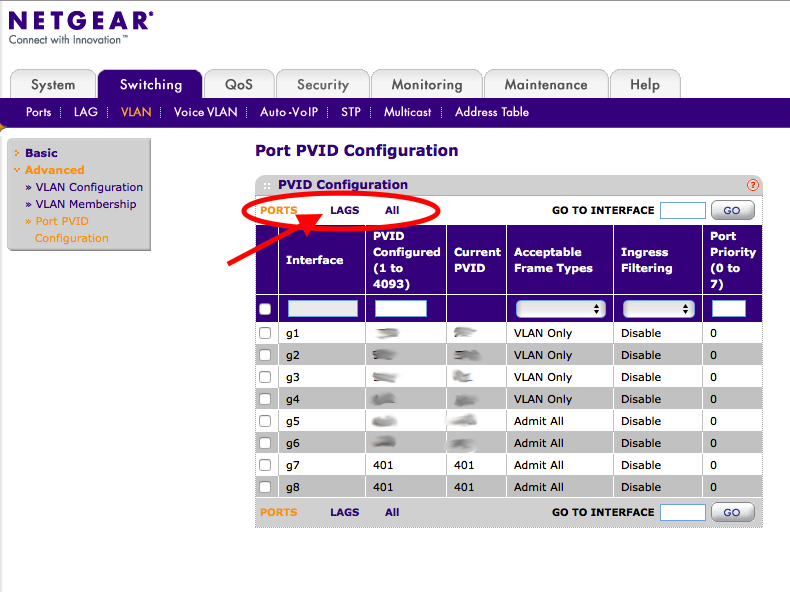
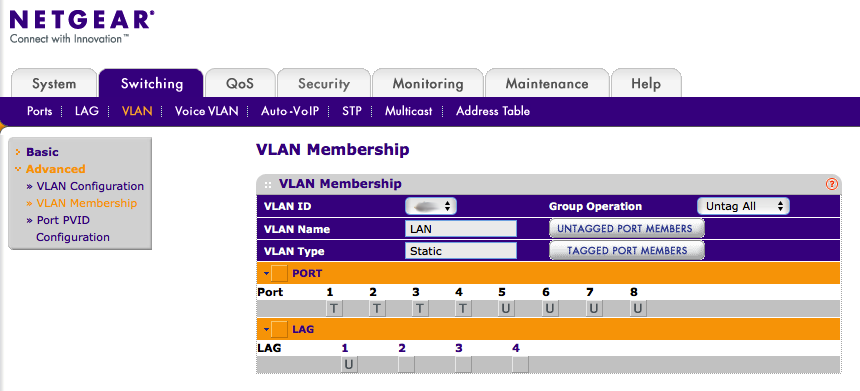
The NetGear interface doesn’t show LAG settings by default – you need to explicitly select “LAG” or “All” settings. I overlooked this at first:
Incorrect VLAN settings caused the NAS to drop off the network; LAG traffic wasn’t tagged even though both physical interfaces were properly configured. It took me a while to realize and fix.
So, here’s a couple of screenshots:
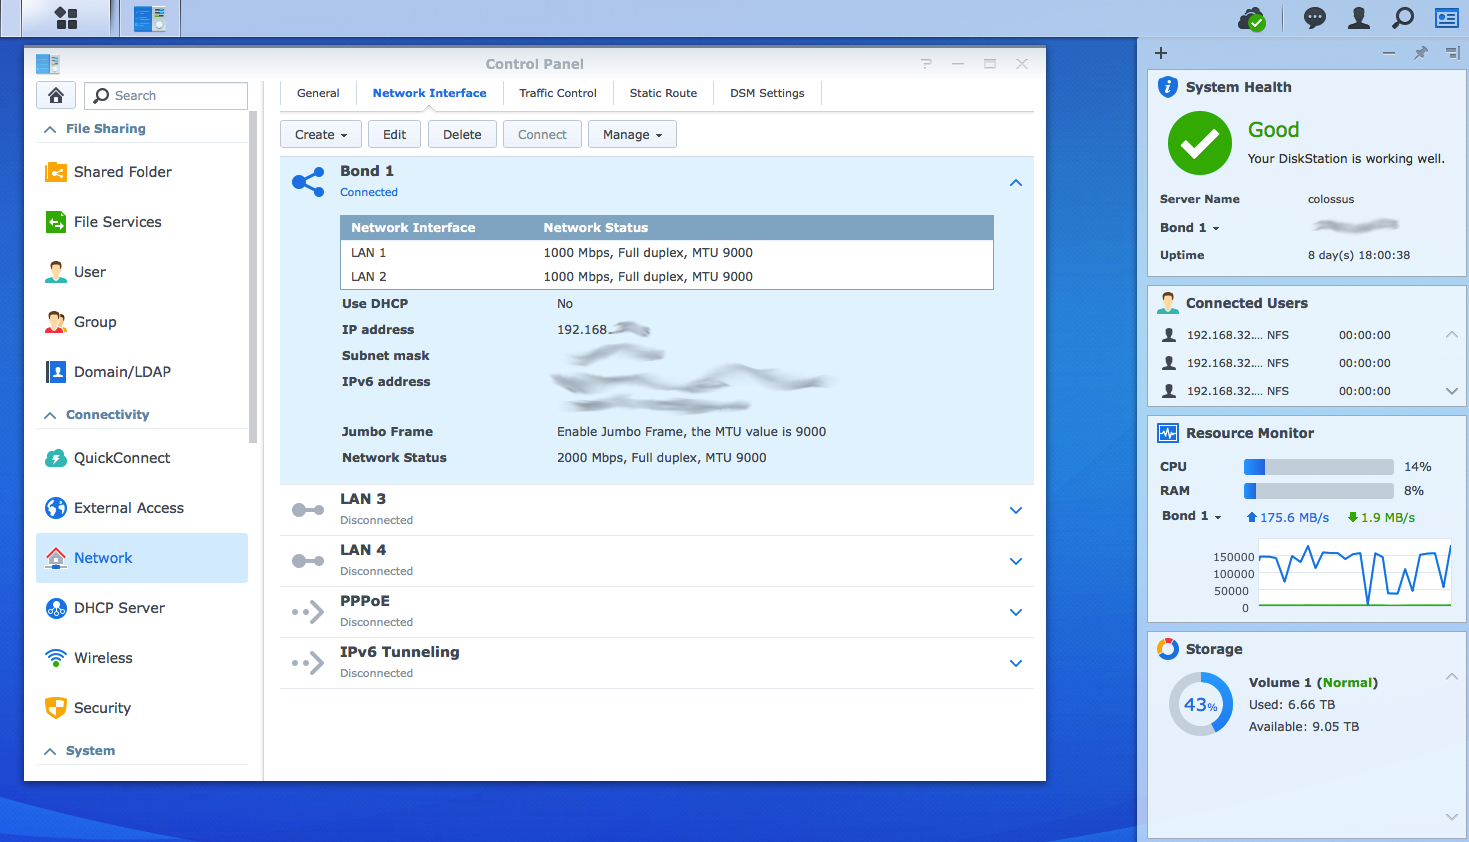
Step 1: Synology – Create bond, set IP and Jumbo Frames on the bond
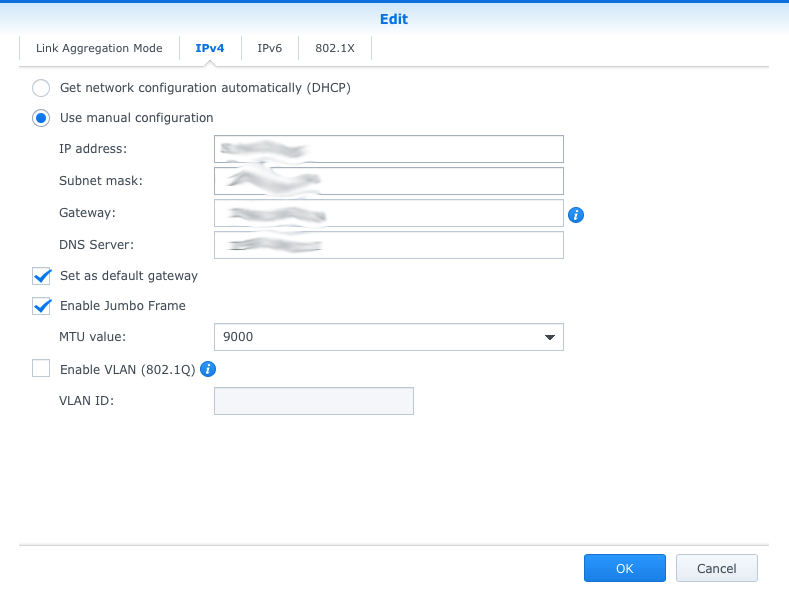
Step 2: Netgear – Create LAG, set VLAN and Jumbo Frames on the LAG
Create LAG, select members:

Configure VLAN membership and PVID for the LAG as well:
Step 3: Connect and enjoy twice the network bandwidth
I tried copying a couple of large files from the NAS to two different vSphere hosts – throughput clearly exceeds 1Gbps now.
